Integrating an API on your own server is a lot more rock solid than using zapier or another API connector and it's free forever.
You never have to worry about zapier going down, missing any leads or any bugs from future updates…
This is truly set and forget it, so now you can sleep good at night knowing your sales team is not missing any leads.
Lets start with this is super secure but a little more complicated oauth security and key expiration but it's not the end of the world I'll make this easy to follow along, even if you have never written a line of code in your life… You can do this with mostly copy and paste but make sure to use your own credentials!
A zoho account is required…
Step 1: Register a Zoho API Client
We need to create a Zoho API Client to obtain the client_id and client_secret.
1. Go to the Zoho API Console:
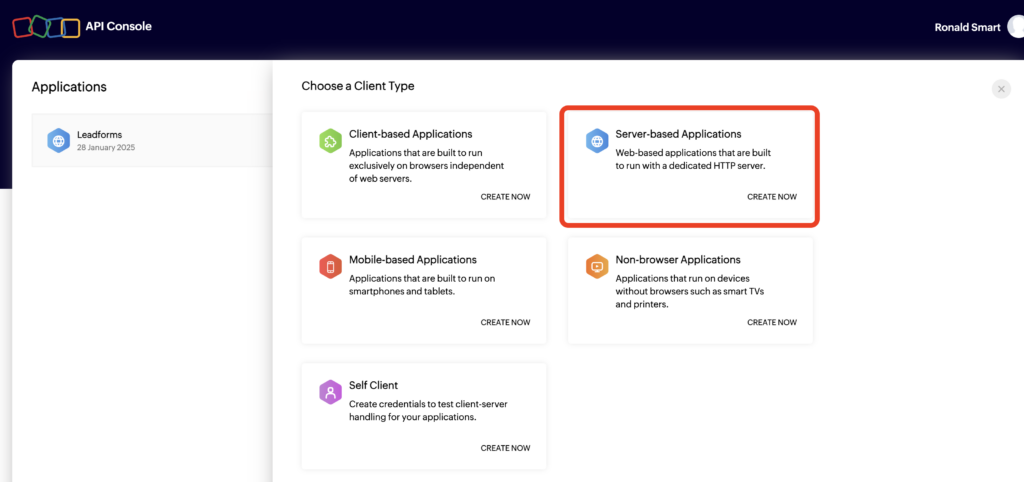
2. Create a New Client:
• Click “Add Client”
• Select “Server-based Applications”
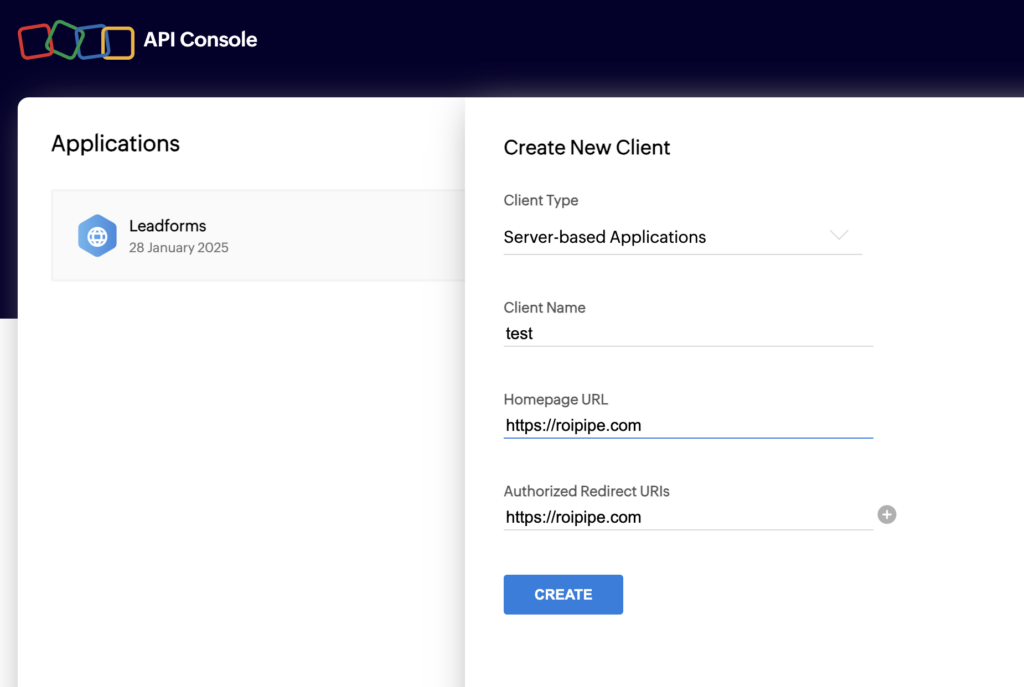
• Fill in the details:
• Client Name: ROI Pipe (or any preferred name)
• Homepage URL: https://roipipe.com (The domain name you are working on)
• Authorized Redirect URI: https://roipipe.com (The thank you page or pages you plan on redirecting to)
• Click Create
3. Save the credentials:
• Client ID: YOUR_CLIENT_ID
• Client Secret: YOUR_CLIENT_SECRET

Enter client details then click create

Take note of the client id & client secret. You can always come back for it later.

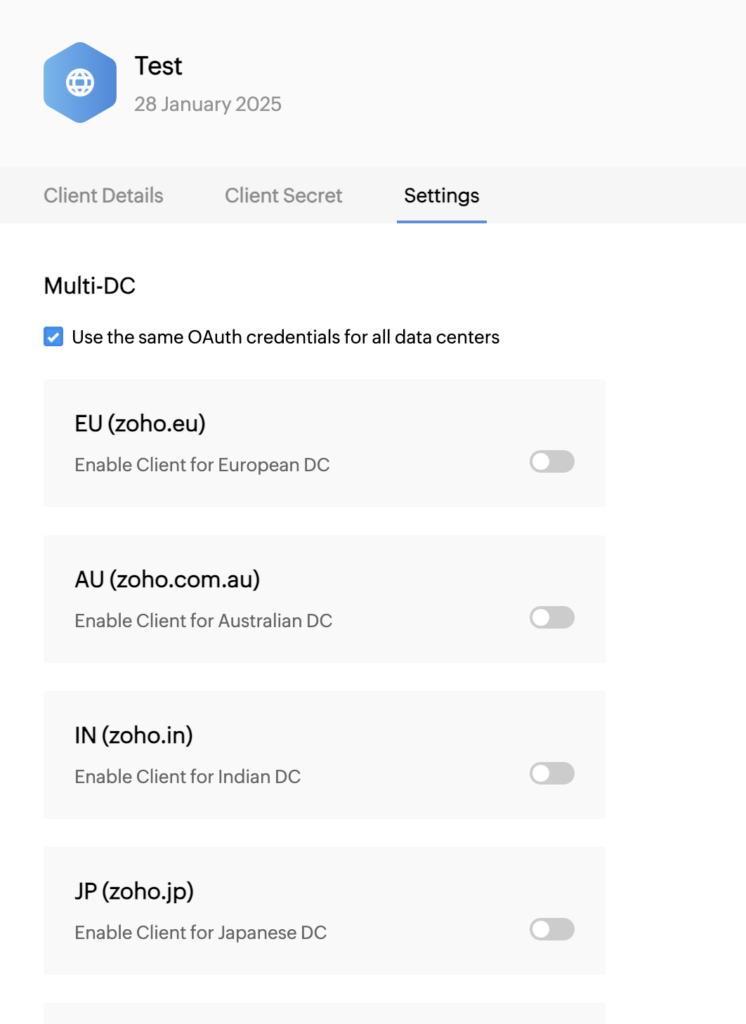
Settings is geared around data centers. I would assume you could use the same oauth for all data centers but don't quote me on it. Thats what we are doing. Possibly a security concern depending on the country you are generating leads in and may want to separate it.

Step 2: Generate an Authorization Code
1. Open the following URL in your browser (replace YOUR_CLIENT_ID and YOUR_REDIRECT_URI):
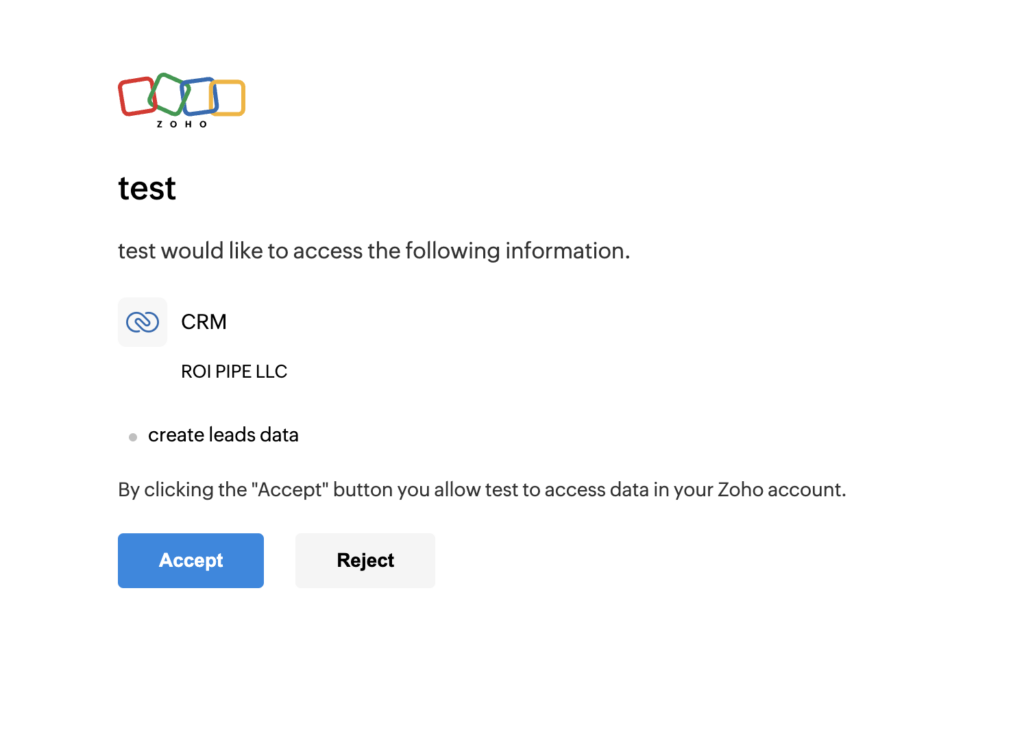
https://accounts.zoho.com/oauth/v2/auth?response_type=code&client_id=YOUR_CLIENT_ID&scope=ZohoCRM.modules.leads.CREATE&redirect_uri=YOUR_REDIRECT_URI&access_type=offlineThe browser will redirect to the auth page then click Accept then you will be redirected to your landing page and your AUTHORIZATION_CODE will be in the URL go ahead and copy it and save it in a safe place with your other creds for this process.

You will see something like this in the URL bar you will need the code portion for the next step:
https://roipipe.com/?code=your_code_here&location=us&accounts-server=https%3A%2F%2Faccounts.zoho.com
Then open terminal, don't get intimidated it's super simple. Past the curl command below into terminal after you have edited it with your information. Then click enter.
curl --location --request POST 'https://accounts.zoho.com/oauth/v2/token' \
--header 'Content-Type: application/x-www-form-urlencoded' \
--data-urlencode 'grant_type=authorization_code' \
--data-urlencode 'client_id=YOUR_CLIENT_ID' \
--data-urlencode 'client_secret=YOUR_CLIENT_SECRET' \
--data-urlencode 'redirect_uri=YOUR_REDIRECT_URI' \
--data-urlencode 'code=YOUR_AUTHORIZATION_CODE'
If you got an error like I did don't worry we just took too long to run the curl command. The keys we generated prior only last about one minute so we have to do this quick and good thing we got some practice. Lets do it again.
Ok this time I did it fast enough and it worked
📌 Save the following securely:
• access_token (expires in 1 hour)
• refresh_token (does not expire unless revoked)
Step 4: Create HTML Form
🔹 Save as form.html
<!DOCTYPE html>
<html lang="en">
<head>
    <meta charset="UTF-8">
    <meta name="viewport" content="width=device-width, initial-scale=1.0">
    <title>Zoho CRM Lead Form</title>
</head>
<body>
    <h1>Zoho CRM Lead Form</h1>
    <form action="process-form.php" method="POST">
        <label for="first_name">First Name:</label>
        <input type="text" id="first_name" name="first_name" required><br><br>

        <label for="last_name">Last Name:</label>
        <input type="text" id="last_name" name="last_name" required><br><br>

        <label for="email">Email:</label>
        <input type="email" id="email" name="email" required><br><br>

        <label for="phone">Phone:</label>
        <input type="tel" id="phone" name="phone"><br><br>

        <button type="submit">Submit</button>
    </form>
</body>
</html>
Step 5: Process Form & Send Data to Zoho & IF token is expired this script will generate a new one for you…
🔹 Save as process-form.php
<?php
function getAccessToken() {
    $tokenFile = 'token.json';
    if (file_exists($tokenFile)) {
        $storedTokenData = json_decode(file_get_contents($tokenFile), true);
        if (time() < $storedTokenData['expires_at']) {
            return $storedTokenData['access_token'];
        }
    }
    return refreshAccessToken();
}

function refreshAccessToken() {
    $clientId = 'YOUR_CLIENT_ID';
    $clientSecret = 'YOUR_CLIENT_SECRET';
    $refreshToken = 'YOUR_REFRESH_TOKEN';

    $url = 'https://accounts.zoho.com/oauth/v2/token';
    $data = [
        'grant_type' => 'refresh_token',
        'client_id' => $clientId,
        'client_secret' => $clientSecret,
        'refresh_token' => $refreshToken,
    ];

    $ch = curl_init($url);
    curl_setopt($ch, CURLOPT_POST, true);
    curl_setopt($ch, CURLOPT_POSTFIELDS, http_build_query($data));
    curl_setopt($ch, CURLOPT_RETURNTRANSFER, true);

    $response = curl_exec($ch);
    curl_close($ch);

    $responseData = json_decode($response, true);

    if (!isset($responseData['access_token'])) {
        die('Error: Unable to refresh token');
    }

    $storedTokenData = [
        'access_token' => $responseData['access_token'],
        'expires_at' => time() + 3600
    ];
    file_put_contents('token.json', json_encode($storedTokenData));

    return $responseData['access_token'];
}

// Get a valid token before making API call
$accessToken = getAccessToken();

// Handle Form Submission
if ($_SERVER['REQUEST_METHOD'] === 'POST') {
    $firstName = $_POST['first_name'];
    $lastName = $_POST['last_name'];
    $email = $_POST['email'];
    $phone = $_POST['phone'];

    $apiUrl = 'https://www.zohoapis.com/crm/v5/Leads';
    $data = [
        'data' => [
            [
                'First_Name' => $firstName,
                'Last_Name' => $lastName,
                'Email' => $email,
                'Phone' => $phone,
            ]
        ]
    ];

    $headers = [
        'Authorization: Zoho-oauthtoken ' . $accessToken,
        'Content-Type: application/json',
    ];

    $ch = curl_init($apiUrl);
    curl_setopt($ch, CURLOPT_POST, true);
    curl_setopt($ch, CURLOPT_POSTFIELDS, json_encode($data));
    curl_setopt($ch, CURLOPT_HTTPHEADER, $headers);
    curl_setopt($ch, CURLOPT_RETURNTRANSFER, true);

    $response = curl_exec($ch);
    $httpStatus = curl_getinfo($ch, CURLINFO_HTTP_CODE);
    curl_close($ch);

    if ($httpStatus === 201 || $httpStatus === 200) {
        echo 'Lead successfully added to Zoho CRM.';
    } else {
        echo 'Error adding lead to Zoho CRM. Response: ' . $response;
    }
} else {
    echo 'Invalid request method.';
}
?>
Step 6: Test Submission
1. Open form.html in your browser.
2. Fill in the details and click submit.
3. ✅ If successful, the lead will be added to Zoho CRM.
4. If there’s an issue, check token.json and verify if the token is being refreshed.
How Token Refresh Works Automatically
• getAccessToken() checks if the token is still valid.
• If valid, it uses the stored token.
• If expired, it automatically refreshes the token using refreshAccessToken().
• The new token is stored in token.json and used for future API requests.
Final Notes
✅ No need for manual token refresh! The form automatically refreshes the access token before sending leads.
✅ Secure the refresh_token: Store it in a secure place like environment variables instead of hardcoding it.
✅ For debugging, add var_dump($response); inside the process-form.php script to view Zoho’s response.
🔥 Now your system is fully automated! 🚀 Let me know if you need any modifications or debugging assistance.
